I recently replaced my “house” battery, and since those darn things are not cheap I wanted to take good care of it.
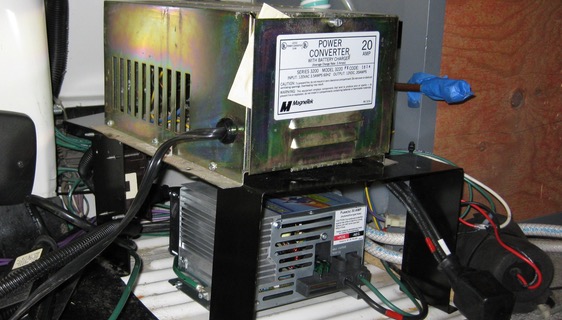
In the Camper, there is a “converter” - it’s job is to supply 12 volts to the furnace, power to 12 volt outlets, and to charge the house battery when connected to AC (“shore power”). The stock converter is a MagneTek - a HUGE unit that provides very “dirty” (unregulated) 12 volts, as well as poor performance as a battery charger.
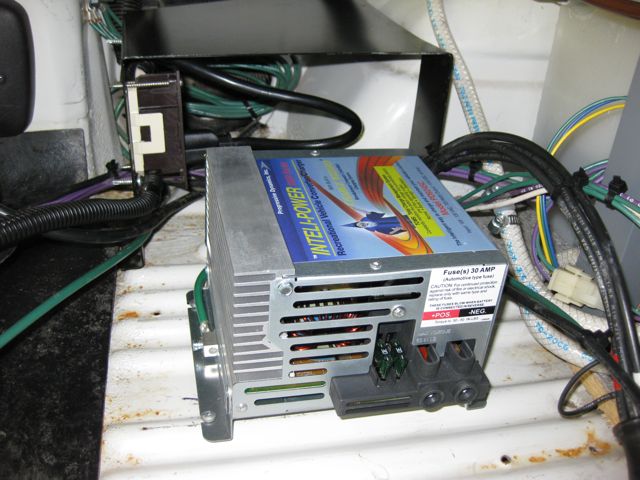
I chose an Progressive Dynamics Intelli-Power model PD 9245C from Best Converter. It has a remote “pendant” for controlling the state of the charger (boost, normal, storage), which is easy to mount on the electrical panel.
You will need some 1/8 inch thick by 3/4 or 1 inch wide copper or aluminum bar stock (non-anodized - the anodized coating on aluminum is not a good conductor of electricity), hacksaw, drill, patience, an afternoon, and your favorite libation (for consumption when you are done).
Disconnect your house battery and shore power and shutoff your propane before starting!
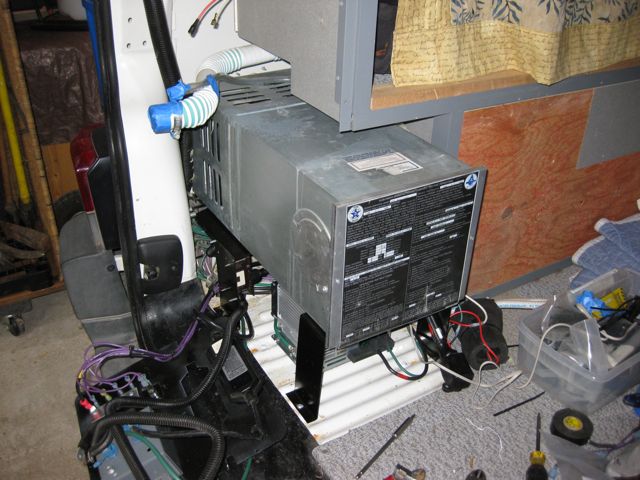
To install, you need to remove the back seat, the two plastic shrouds over the furnace ducts and the water fill area, and your furnace (really easy - disconnect propane, unplug electrical, open front cover, remove two screws, slide out) - so you end up with this (sorry, did not take photos of the stuff coming out - this shows the new converter):
You could do this without removing all this, but it is really nice to have the room, and while you are in there you can replace all your driver side taillights! (use ORIGINAL Honda ones - very good quality! - single filament part # 34903-SF1-A01, dual filament part # 34906-SL0-A01)
Once you have the furnace out, remove the front bracket that the furnace was screwed to - notice that the mounting holes for the furnace are in the front of this bracket - you will need to remember this when you put it back!
Now you have LOTS of room - notice how the MagneTek looks like a piece of WWII surplus gear? If yours is still working, you can use it to create a test power source for your Norcold bench test rig (upcoming project…).
IMPORTANT! All the wiring in the “house” part of your van follows the same color codes as your home - black is HOT, green is ground, etc.
Unscrew the front cover to the MagneTek and undo the 3 wire nuts that connect the MagneTek to your house wiring (umm… guys, wire nuts are NOT for use in vehicles… jeez…). If you read the panel of the MagneTek, you will see that there are 2 hot outputs and a ground - one hot is “filtered” (poorly) and one is not. The “filtered” lead is the smaller one, and it supplies current to the 12 volt outlet near the fridge and other locations.
You will notice that the Intelli-Power has only 2 terminals - you DO NOT need the filtered wire, as the output of the new converter is already filtered.
SAFETY NOTE: Fuses protect WIRES, not what the wires connect to - a device may (or may not) have internal fuses or other means to protect itself. If you connect a small wire to a large fuse, the wire could heat up from excess current, possibly causing a fire - long before the fuse would fail. So make sure that you don’t use the filtered wire - it is only a #10 wire, and a #8 wire should be used with the converter.
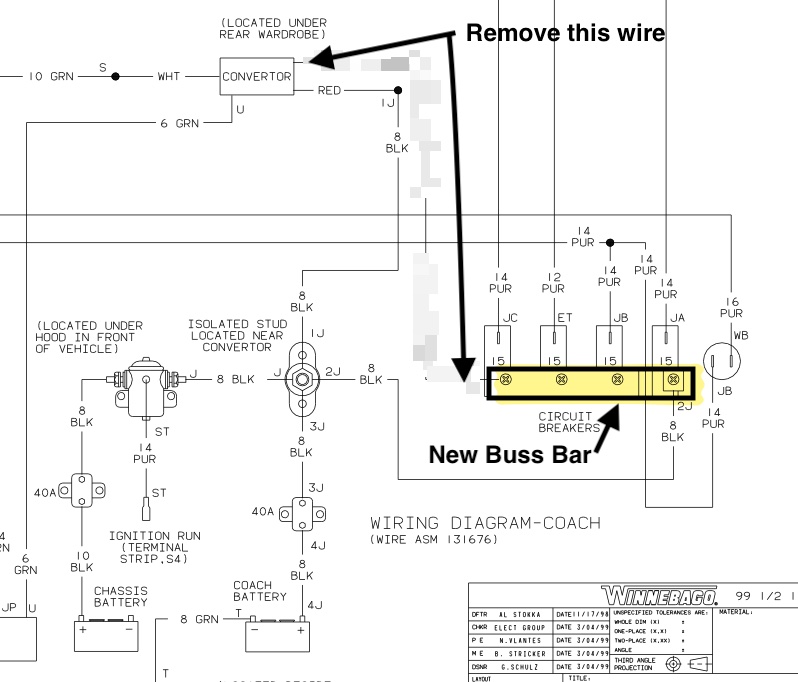
So what you need to do is remove the small “filtered” wire, and extend the aluminum buss bar so that all the 12 volt circuit breakers are connected- like so:
BEFORE:
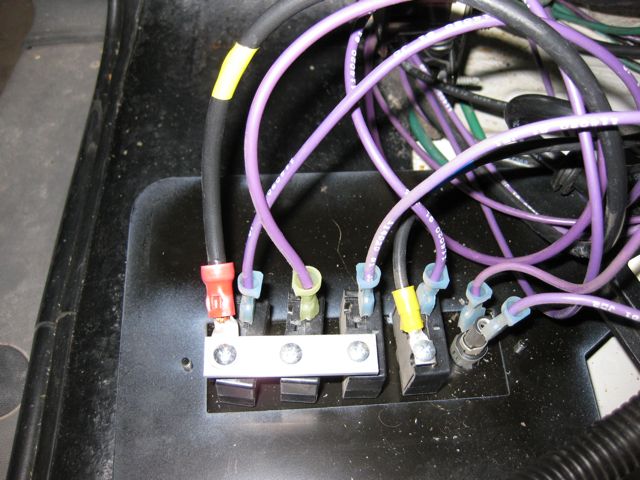
AFTER:
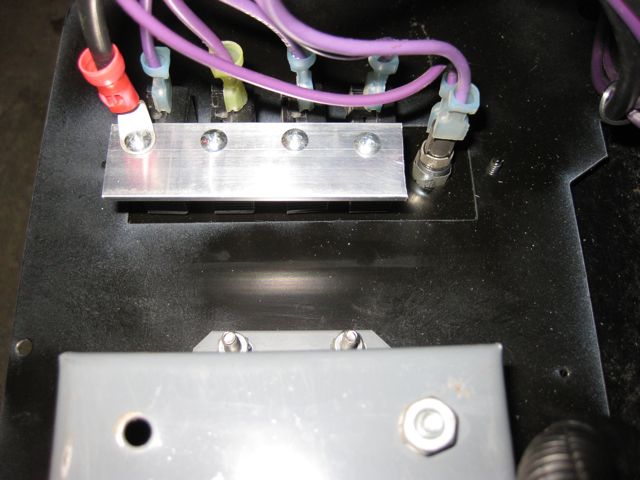
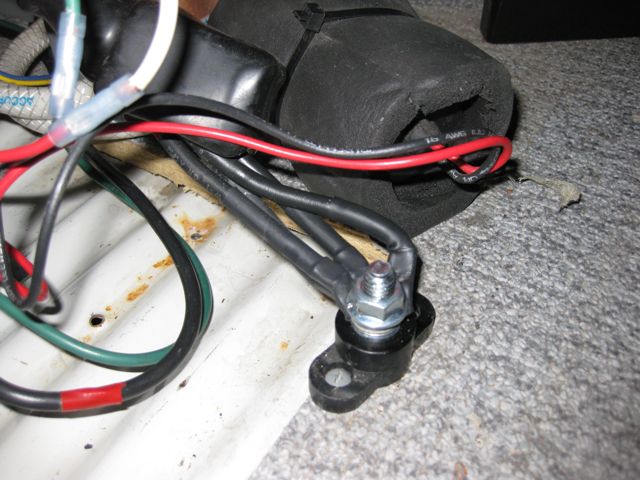
You should end up with a #8 wire going from the Intelli-Power to the isolated stud, and another #8 wire from the isolated stud to the new buss bar.
Here is a diagram of the new wiring:
Next change - the MagneTek has a right angle plug - the Intelli-Power does not. My solution was to change the mounting position of the outlet this connects to by putting the outlet on the INSIDE of the mounting bracket:
Screw the Intelli-Power to the floor - also, screw in the old screws from the MagneTek to plug the unused holes - TIP: use some silicone around the screws to seal them up and minimize corrosion.
Also, check the tightness of the connections on the isolated stud that holds all the hot wires to the battery (remember, black is HOT when working in the “house” part of your van):
As a side note, on my model of EuroVan, the line to the rear sprayer runs under the converter. We have never used our rear sprayer in almost 10 years, and I don’t like mixing electricity and water, so I removed the rear sprayer “T” connection to make it more tidy back there.
When you connect the wires to the Intelli-Power - do not over tighten the terminals. You also want to wiggle the stranded wires after you think it is tight enough, and tighten again. There is an inch pound torque value listed on the Intelli-Power - you will want to follow that.
Make sure to test this BEFORE you put all the bits and pieces back together - maybe even run it for a few hours while you enjoy your tasty beverage, and put the pieces back on the next day! Check the voltage at one of the 12 volt outlets - it should be 13.6 while plugged into AC (may be up to 14.2 if your battery needs a “boost”), 13.2 for a “float” charge, and 12.8 or thereabouts when unplugged, depending on the condition of your house battery. The remote pendant indicates the “mode” the pendant is in.
Here is some more info on the remote pendant: Progressive Dynamics.
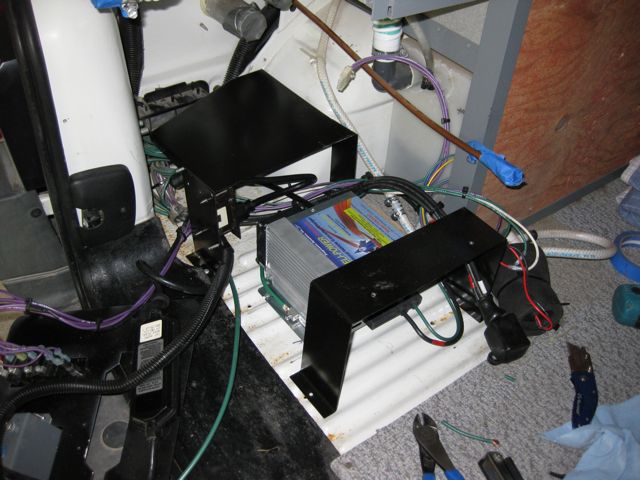
Here is what it looks like with the furnace installed:
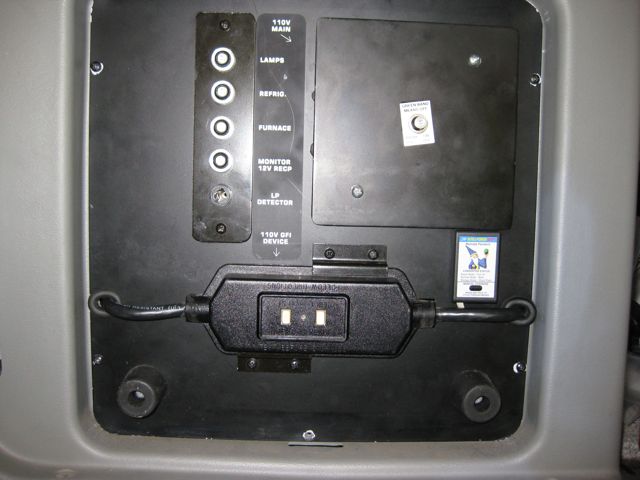
Here is where I mounted the remote pendant (it is the thing with the silly wizard graphic):