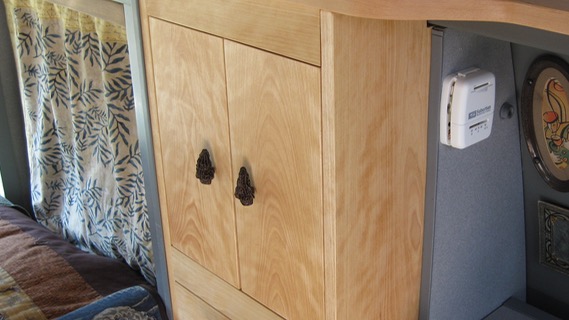
The EuroVan has a small cabinet to the left of the sink/stove - we call it the “Food Cabinet”. Below this cabinet is a small drawer, which is poorly designed - it cannot open to it’s full depth, and is a pain to get back in place if you pull it out. Others have added “normal” drawer slides to the drawer to improve its usability - we started to do this, and then decided to redo the entire cabinet - like so:
We now have a drawer that is 14 inches deep, as well as almost double the storage area for food.
As with every modification we have made (except the MaxxFan roof vent, this is a “non-destructive” modification - the stock parts can be put back in - no damage done!
Here is how we did this, as well as things to consider if you want to do this yourself:
I removed the existing drawer and door, as well as the metal frame - and saved the 4 “L” brackets for the new cabinet. The thermostat wires run through the metal frame, so you will need to disconnect the thermostat and pull the thermostat wires out (make sure to disconnect your house battery first!). When you install the new side, you need to make some provision for the wires (I routed a groove in the backside of the right side).
There is “T” molding on both sides of the cabinet - in order to allow the right side of the cabinet to not run into the molding, I applied one side of some Velcro to the inside surface of the wall that the thermostat mounts to - not only do you get clearance, but the new cabinet does not rub on the existing laminated surface. This is a technique I used throughout the van - placing one side of Velcro between metal and wood, plastic and wood, etc.
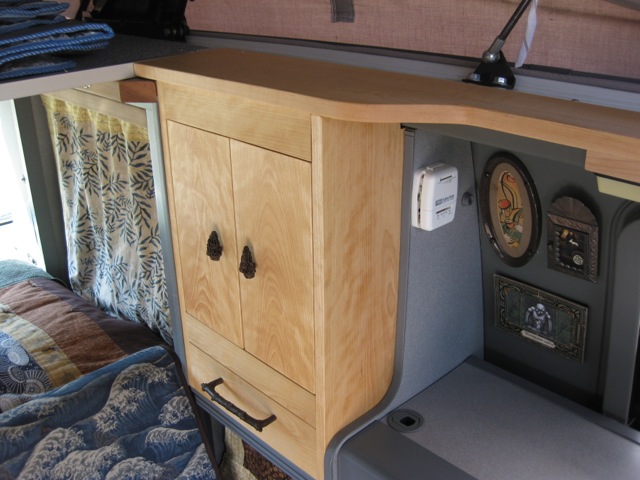
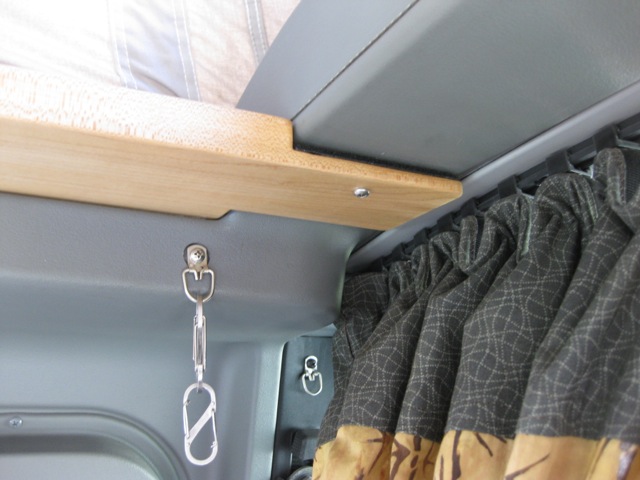
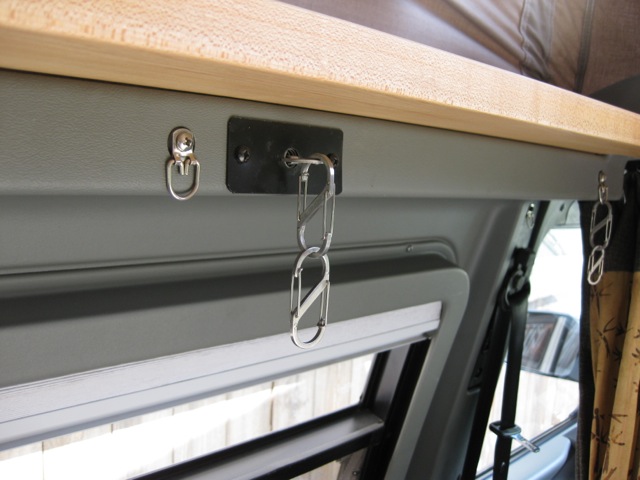
Since the new cabinet “sticks out” past the existing “top”, we used this as an excuse to build a shelf (out of a piece of maple) that runs from the top of the cabinet, over the sink and stove, all the way to the end of the poptop opening:
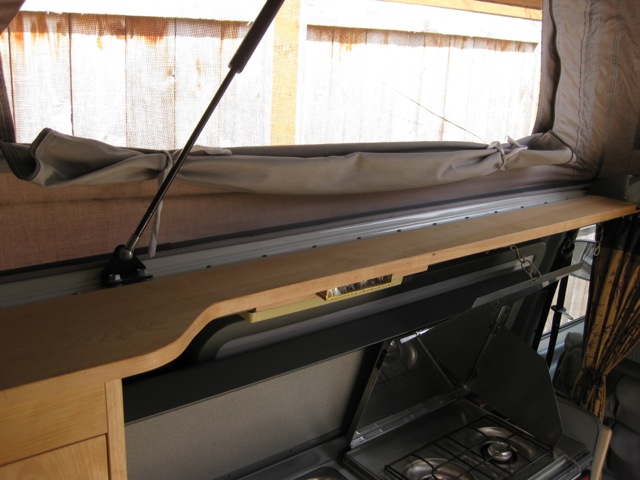
This shelf is a great improvement - when the top is up, you have all kinds of room for glasses, phones, water, etc. Yes, there is Velcro where that shelf rests on the metal!
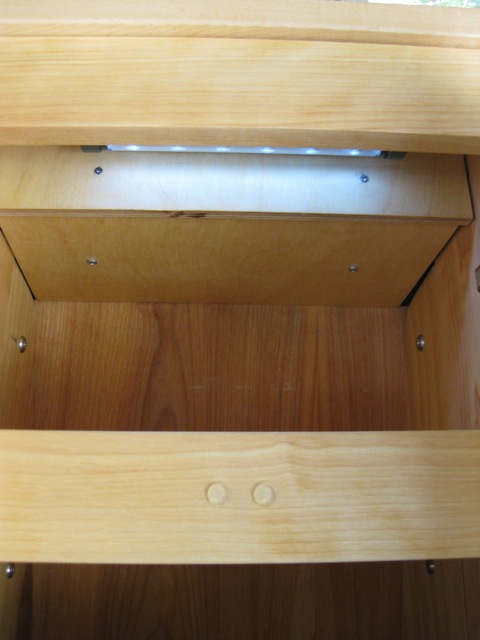
The food cabinet is made of solid birch, with 2 piece sidewalls - the first 7 inches of each wall is birch, the last part is birch plywood, cut to the shape of the outside wall of the van - Deborah made a pattern of each sidewall, as each side is different - the van sides “taper” slightly. The plywood is screwed to the van, and aluminum “L” metal is used to join the 2 piece sidewalls, as well as support the upper and lower shelf. I added a lip to the front of the middle shelf. The bottom shelf is attached with Velcro, for easy access to the drawer for service, etc.
The salvaged “L” brackets are used to support cross pieces that go above and below the doors.
Added a LED light fixture that fits behind the top cross piece, too.
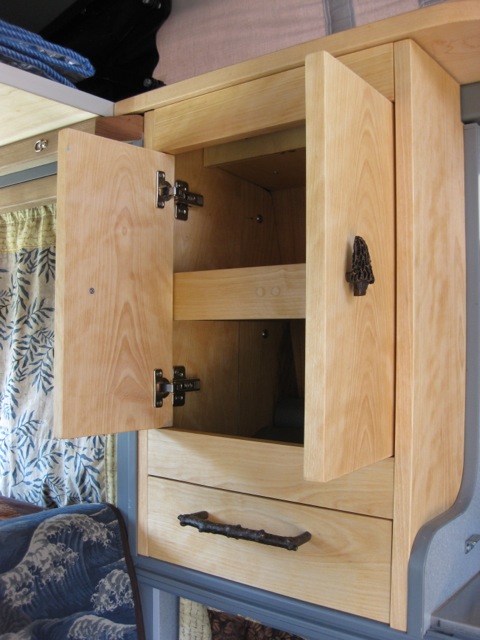
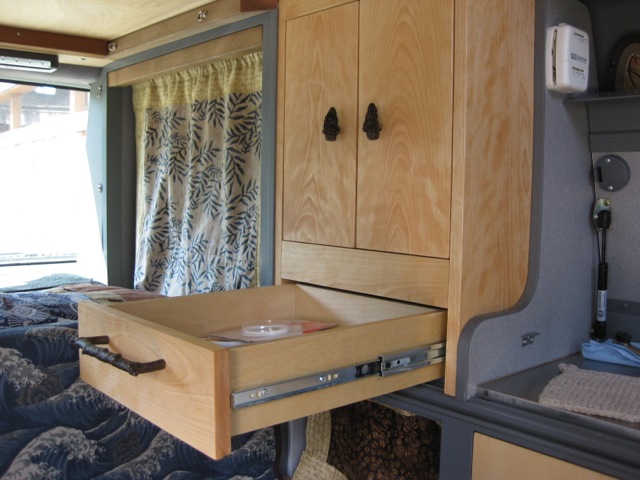
The handles are from Timber Bronze - and yes, the drawer handle does stick out kinda far - I will be recessing that in the future.
Here is a detail of how I supported the “front” edge of the shelf:
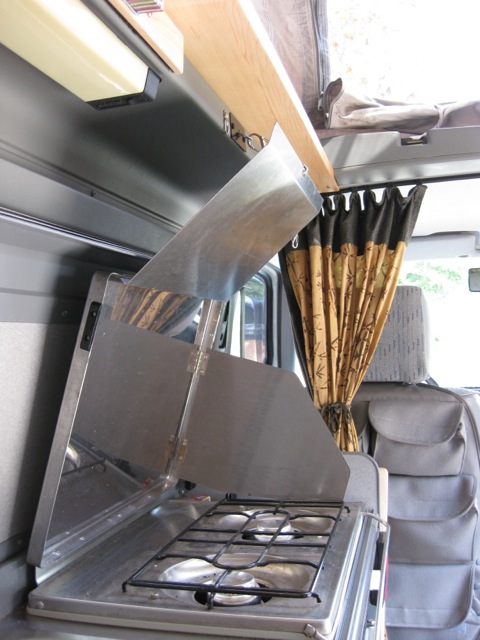
Here is what we do to make sure the stove sends the heat past the shelf:
Like so: