A couple of years ago, while traveling on Route 66 in humid Missouri, chunks of foam started blowing out of our dash vents, filling the cab with sticky bits of disintegrating material - quite a mess. I had remembered reading on the eurovanupdate list that this was from the “blender box” in the air conditioning system - the box that regulates the air flow from the heater, directs air to the defrost, floor, etc. Fixing this requires removing the dash, a project I was NOT willing to undertake, as I felt that “Hey, so I won’t have great control over airflow - no big deal”.
Unfortunately, I was missing a crucial bit of information - the heater is “on” all the time, and the only thing that prevents all that heat from filling the cab is the “blender box”, with its mechanism of PERFORATED flaps, which are supposed to be covered in foam, now disintegrated. After a miserably hot trip to the desert one June, where the cab temperature was unbearable, even with the air conditioning on full (competing with unregulated heater), I knew I had to fix this.
There is a great series of YouTube videos from Thomas about removing the dash - if that link doesn’t work, just search YouTube for “T4 Dash Removal” - I found it very helpful to watch them, to get an idea of what I was in for. This is not a quick project, or a simple one - but once done, you should not have to do it again!
One thing that makes it easier is to remove the front seats. Just 4 bolts on each seat in the 95 EVC!
While I was in there, I replaced the heater core, fan, fan control resistor pack, ignition switch (easier with the steering wheel off) - all from Europarts-SD, as well as replaced my worn out steering wheel (too squishy!) with a good condition used one from The Samba classifieds, wrapped in a leather Wheelskin cover from Eurocampers, and new cigarette lighter from GoWesty (easier with the dash out).
I had read about different materials that other’s had used as a replacement for the foam - thin aluminum “flue” tape, duct tape, craft foam, etc. - I felt that all those materials had certain drawbacks. A material and adhesive is needed that can stand up to heat (in the 200 degree range), is flexible (to seal well and prevent “whistling” as the fan blows air past it), and is easy to apply. I chose to use a high temperature silicone foam. McMaster-Carr to the rescue!
Materials Used:
- (3) 12x12 inch sheets silicone foam with adhesive - 1059N368 - soft
- (1) 12x12 inch sheet silicone foam w/o adhesive (for the vent flaps in 95 ONLY) - 1059N358 - soft
- 15 feet of 1/2 inch wide silicone foam for the blender box and other seals (use for the dashboard on 97 and up - and you can use this for the 95, as well, if you like) - 93415K61
- 15 feet if 3/4 inch wide silicone foam for the dashboard (OPTIONAL - this is the size that was on my 95 - you can just use 1/2 and save some $) - 93415K63
I am not going to get into the details of removing the dash, freeing the blender box, etc - the YouTube videos do a good job of covering that. Take LOTS of photos, so you know how it goes back together, label all vacuum lines and wires, and have lots of patience.
I will share some photos of the “upgraded” blender box, and some additional notes. Many of these shots will make no sense until you have your dash apart.
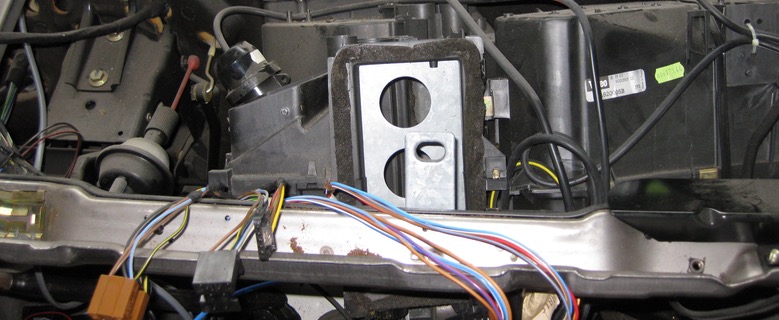
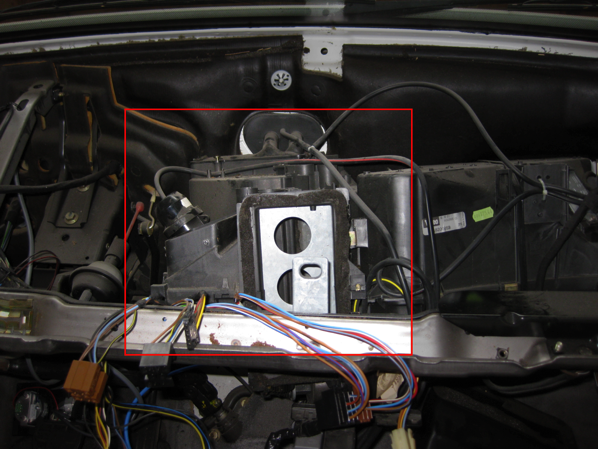
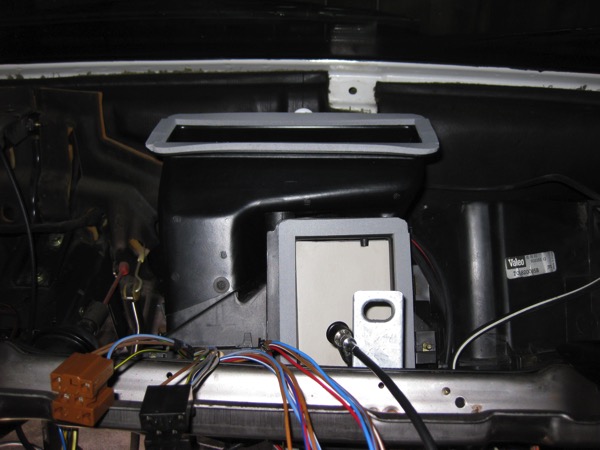
Here is a shot of the dashboard removed - the blender box is right in the middle:
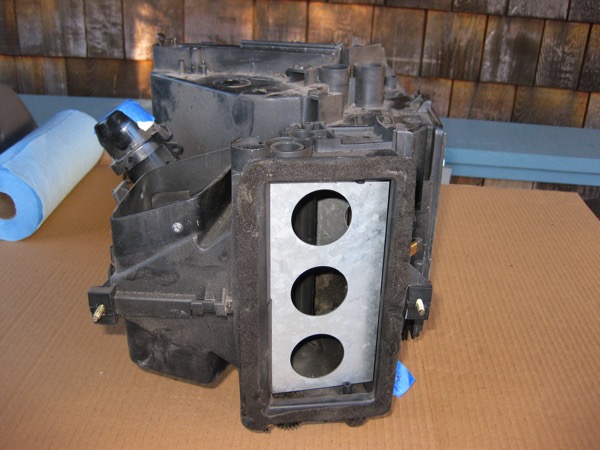
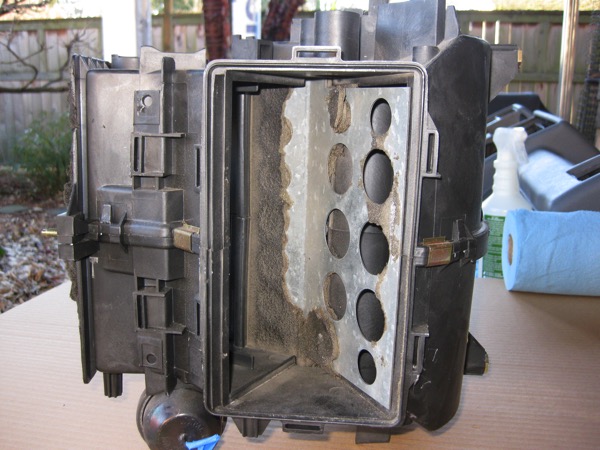
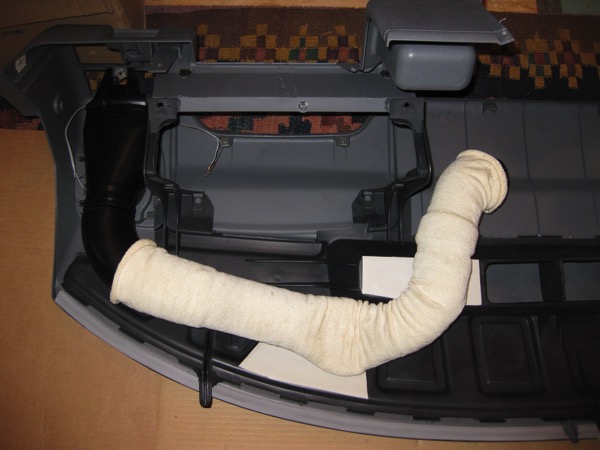
Here is the blender box, removed from the van - the metal flap is perforated to lighten it, but it is SUPPOSED to have a foam covering!
Here is another angle (the inlet side of the blender box), showing some of the old foam, and how it covers the holes:
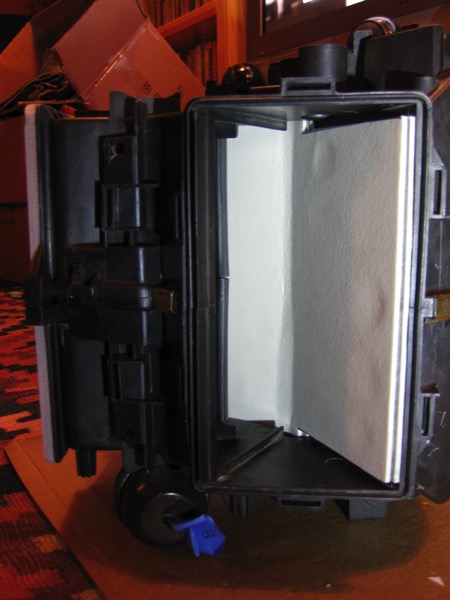
Here is how it looks when completed:
Use paper for templates, trace the shapes on the foam, and cut with scissors:

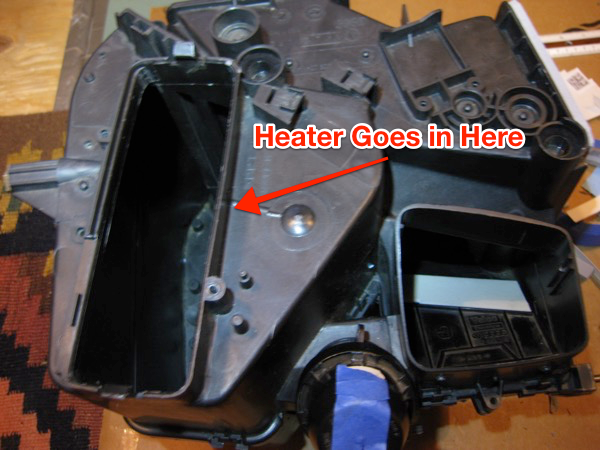
It is IN this box that the heater core is mounted - it fits into the rectangle opening - the flaps are what regulate the heat.
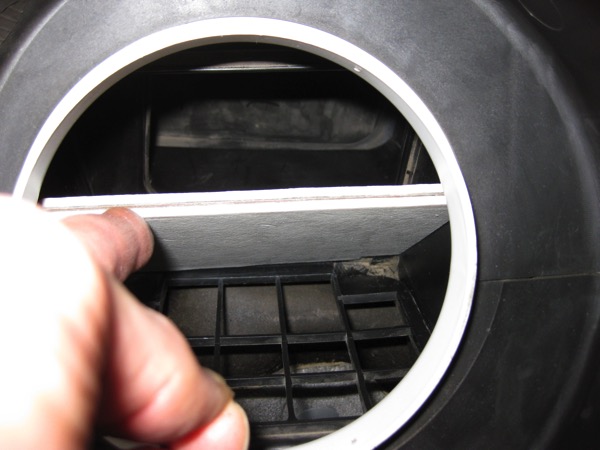
Here is a shot of one of the dash vents, with the old foam, and the new foam:

I also replaced the foam on the flap that is behind the fan - the fresh/recirculating flap. The foam was in pretty good shape here, but I did not want to have to go back in at a later date.
Some of the foam sheets were used on the dash - I just matched what was there - these pieces are there to prevent rattling of the ducts:
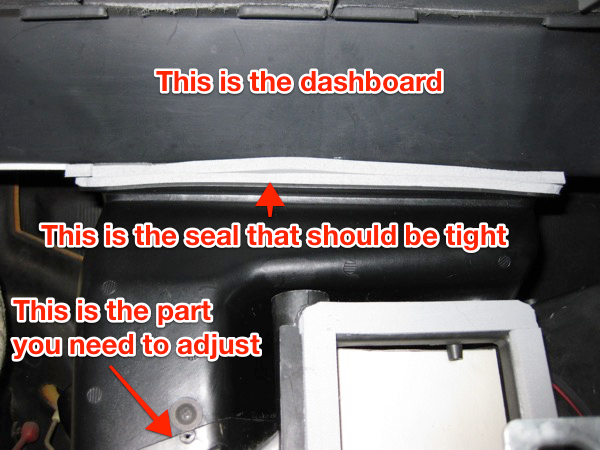
When I reinstalled the dash, I found that there was quite a gap between the blender box and the defrost vent area of the dash - I believe the factory used large amounts of foam to fill that gap. I figured I could do better by adjusting the plastic piece connected to the blender box, as well as applying some additional foam.
First, the additional layer of foam:
Then the adjustment:

Filled that old screw hole with leftover foam sheet:
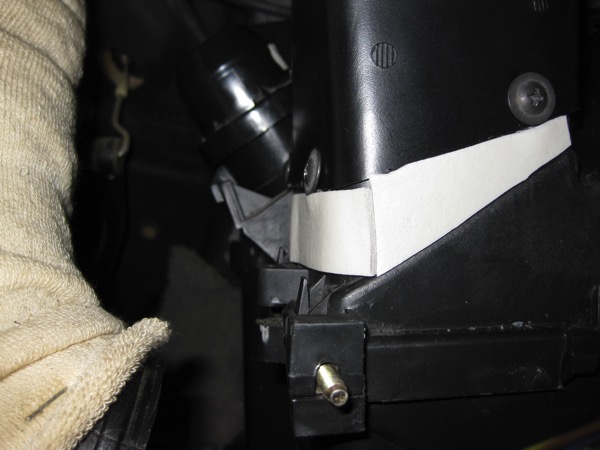
Here is the tight seal - the defrost has never worked so good: